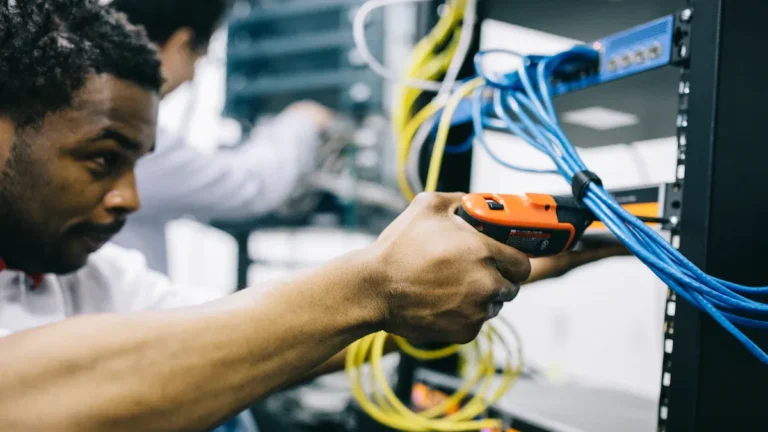
Como fazer um chicote elétrico personalizado para o seu carro em 2025

Sim, you can make custom wiring harnesses for cars by following clear steps. You need to plan, gather your tools and materials, map out your circuits, build the harness, and test each connection. Take your time and stay organized. Many beginners make mistakes like cutting wires too short, skipping the wiring diagram, or using poor-quality connectors. Always secure wires and disconnect the battery before starting. Careful work helps you avoid hazards like short circuits or fire risks, giving your project a safe and professional finish.
Principais conclusões
Plan your wiring harness carefully by mapping circuits, using accurate diagrams, and following industry standards for safety and reliability.
Use quality tools and materials like copper wires, proper connectors, and heat shrink tubing to build a safe and durable harness.
Color code and label each wire clearly to make installation, troubleshooting, and future repairs easier and safer.
Cut, connect, insulate, and bundle wires neatly while protecting them from heat, umidade, and vibration to ensure long-lasting performance.
Test every connection with a multimeter and perform quality checks before installation to avoid faults and ensure your harness works perfectly.
Tools & Prep
Essential Tools
You need the right tools to build a custom wiring harness. Each tool helps you work safely and efficiently. The table below shows the most important tools and their uses:
Tool | Description/Notes |
|---|---|
Fios | Carry electrical signals and power |
Zip ties | Bundle and organize wires |
Heat gun | Shrink heat shrink tubing for insulation |
Terminals | Attach to wire ends for secure connections |
Conectores | Join wires and components |
Multimeter | Test electrical connections and continuity |
Wire cutter | Cut wires to the right length |
Crimping plier | Attach terminals and connectors to wires |
Tubo termorretrátil | Insulate and protect wire connections |
Wire stripper | Remove insulation from wires without damage |
Dica: Always use a multimeter to check your work. This tool helps you find problems before you install the harness.
Materials & Conectores
Choosing the right materials and connectors keeps your harness safe and reliable. Copper wires work best because they conduct electricity well. Use insulation materials like XLPE or silicone rubber for protection against heat and wear. For wet areas, sealed connectors such as Weather Pack or AMP Superseal prevent water from getting in. Gold-plated terminals resist corrosion and last longer. Protective sheathing, like silicone or PVC, guards wires from damage. Always match connector size, bitola do fio, and voltage to your car’s needs.
Use copper wires for strong electrical flow.
Pick connectors designed for your car’s environment.
Select insulation and sheathing that resist heat and abrasion.
Choose terminals with finishes that prevent rust.
Diagrams & Schematics
Accurate wiring diagrams guide you through each step. You can find these diagrams in your car’s owner’s manual or on manufacturer websites. Services like Identifix’s Direct-Hit® offer interactive, full-color diagrams for most American vehicles. Infopro Digital Automotive provides detailed technical databases with up-to-date schematics and repair guides. These resources show circuit layouts, connector locations, and wire colors. Always check official sources to avoid mistakes.
Observação: Diagrams may use different symbols and color codes. Study them carefully before you start building your harness.
Plan Custom Wiring Harnesses for Cars
Map Circuits
Start your project by mapping every circuit you plan to include. This step helps you avoid confusion and ensures each wire serves its purpose. Use detailed schematics and follow industry standards for safety and reliability. Standards like ISO 19642 and SAE J1128 guide you in choosing the right wire gauge and testing for continuity. Always check that your wire gauge matches the current load and keeps voltage drop below 3%. Por exemplo, use 12 AWG wire for high-current circuits.
Test Type | Standard | Pass Criteria | Cost per Sample | Duration | Failure Rate |
|---|---|---|---|---|---|
Continuity Check | ISO 19642 | Resistance variance <0.1Ω | $0.50 | 2 minutes | 0.3% |
Hi-Pot Dielectric | SAE J1128 | No arcing at 1,500V DC | $3.20 | 15 minutes | 1.1% |
Vibration (XYZ axis) | ISO 16750-3 | Resistance change <5% after 100h at 50Hz | $220 | 4 dias | 2.7% |
Ciclismo Térmico | IEC 60068-2-14 | No cracks after 1,000 cycles (-40°C to +125°C) | $180 | 3 weeks | 4.2% |
Spray de sal | ASTM B117 | Corrosion <0.5mm after 96h | $85 | 5 dias | 6.8% |
Pull Force | USCAR-2 | >50N retention for 1.5mm² wires | $1.50 | 10 minutes | 0.9% |
Dica: Always perform a 100% continuity test at 50V DC before installing your harness. This step catches wiring errors early.
Industry standards also require you to keep wires away from heat sources by at least 100mm and use corrosion-resistant sleeves in wet areas. Group signals by voltage type and shield sensitive lines like CAN bus to prevent interference. These steps help your custom wiring harnesses for cars meet quality and safety requirements.

Color Coding & Rotulagem
Color coding and labeling make your harness easy to build, install, and repair. Use color-coded wires to show the function of each circuit. Por exemplo, red wires often carry power, black wires go to ground, and yellow wires may signal accessories. Following standard color schemes reduces mistakes and helps you or anyone else understand the harness later.
Labeling adds another layer of clarity. Use heat shrink sleeves, wrap-around labels, or wire flags to mark each wire. Include information like circuit name, date code, or even a barcode for advanced tracking. This practice prevents electrical hazards and makes troubleshooting much faster. You can spot a problem wire quickly if each one has a clear label.
Color coding helps you identify wires by function, tensão, or location.
Labels remove confusion and provide extra details, such as serial numbers or certification codes.
Clear identification improves safety and helps you isolate faults.
Maintenance becomes easier because you can trace wires without guessing.
Proper labeling ensures your custom wiring harnesses for cars meet safety and performance standards.
Observação: Durable labels stay readable even in hot, wet, or dirty environments. Choose the right label type for your car’s conditions.
Layout & Grouping
Plan your harness layout before you start cutting or connecting wires. Lay out the harness on a flat surface, such as a large table or a formboard. This step lets you group wires by function and tape them together for neatness. Grouping wires by voltage type—such as keeping high-voltage and low-voltage circuits separate—prevents interference and improves safety.
Separate high-voltage and low-voltage wires to avoid electromagnetic interference.
Use protective sheaths or metal shielding between different voltage bundles.
Bundle wires with zip ties, spiral wraps, or cable sleeves for strain relief and a tidy look.
Keep high-voltage runs as short as possible to reduce resistive loss.
Plan your layout using formboards or 3D models to optimize routing.
Select wire gauges, isolamento, and connectors that match your car’s needs.
Dica: Standardize your layout and grouping methods. This approach makes future repairs or upgrades much easier and keeps your custom wiring harnesses for cars looking professional.
Careful planning at this stage sets the foundation for a reliable, safe, and easy-to-maintain harness. When you follow these best practices, you avoid common mistakes and ensure your custom wiring harnesses for cars meet both your needs and industry standards.
Build the Harness

Cut & Prepare Wires
Start by measuring each wire according to your layout plan. Always add a little extra length to each wire so you can make adjustments during installation. Most automotive wiring uses gauges between 4 AWG and 16 AWG. Use thicker wires, like 4 AWG or 8 AWG, for high-current circuits such as battery cables or starter motors. Use thinner wires, like 16 AWG or 18 AWG, for lights, sensors, and other low-current devices. Copper wires work best because they carry electricity well and last a long time. Some modern cars use aluminum wires to save weight, but copper remains the standard for most custom wiring harnesses for cars.
Strip the insulation from the ends of each wire using a wire stripper. Make sure you do not nick or damage the wire strands. Damaged wires can break or cause poor connections. If you need to run wires through areas with high heat or sharp edges, use protective jackets or heat-resistant sleeves. This step keeps your wires safe from heat, umidade, and vibration.
Dica: Always double-check your wire lengths before cutting. Wires that are too short can cause problems during installation.
Connect & Splice
You need strong, reliable connections for your harness to work safely. For most connections, use crimped butt connectors. Strip the wire ends, insert them fully into the connector, and use a ratcheting crimper to compress the barrel. This method creates a tight, stable connection that will not loosen over time. For splicing two wires together, the Western Union (Lineman’s) splice is a great choice. Twist the wires together, bend the ends, and wrap them tightly. This splice holds up well under tension and vibration.
After making each connection, cover it with heat shrink tubing. Slide the tubing over the joint and use a heat gun to shrink it. This seals the connection and keeps out moisture and dirt. Avoid using quick connectors like ScotchLok on stranded wire. These can damage the strands and reduce the reliability of your custom wiring harnesses for cars.
Observação: Shielded cables are important for sensitive circuits, such as audio or data lines. The shield blocks electric and magnetic fields, protecting your signals from noise and interference. Always ground the shield at one end to prevent unwanted currents.
Insulate & Bundle
Protecting your wires is just as important as making good connections. Use insulation and bundling materials that match the environment in your car. For engine bays, choose flame-retardant corrugated tubes. These tubes resist heat, água, and mechanical wear. In the cabin, you can use PVC heat shrink tubes or PET winding tubes for a neat finish. For tight spaces, wrap wires with tape or use sponge tape to reduce noise and vibration.
Corrugated tubes protect wires in harsh areas like the engine or chassis.
PET braided sleeves offer wear resistance and are easy to install around bends.
Dual-wall adhesive heat shrink tubing seals wires against liquids and chemicals.
Fiberglass braided sleeves handle very high temperatures near motors or exhausts.
Use cable ties, spiral wraps, or self-closing sleeves to bundle wires by function.
Bundling wires keeps your harness organized and reduces the risk of damage. Always group wires by voltage and function. This makes future repairs easier and prevents interference between circuits.
Route & Secure
Plan your wire routes before you start installation. Keep wires away from moving parts, sharp edges, and hot surfaces. Use cable ties, clamps, and brackets to hold the harness in place. When wires pass through metal panels, use rubber grommets to prevent chafing. Add strain relief near connectors to absorb pulling forces and protect the wire ends.
Mark each wire with tags or labels for easy identification.
Cover unused wires with tape or heat shrink tubing to keep things tidy.
Use mechanical fasteners to prevent wires from moving or vibrating loose.
Avoid sharp bends and tight corners. This prevents stress and makes maintenance easier.
Route sensitive wires, like those for sensors or data, away from high-power cables to reduce interference.
Shielded cables help protect sensitive circuits from interferência eletromagnética. This is especially important in electric vehicles, where high-frequency noise can affect signal quality. Proper routing and securing keep your custom wiring harnesses for cars safe, confiável, and easy to service.
Safety Reminder: Always disconnect the battery before working on your car’s wiring. This prevents shocks and protects your new harness from accidental damage.
Quality Control Checks
You must check your work before installing the harness. Start with a visual inspection. Look for loose connections, damaged insulation, or poor crimps. Use a multimeter to test continuity and make sure every wire carries current from end to end. Check connectors and grounding points for corrosion. Perform a wiggle test by gently moving wires and connectors to find any loose spots. Advanced cable harness testers can simulate vibration and bending to ensure your harness will last under real-world conditions.
Pull on each wire to check for weak connections.
Test the harness in both hot and cold conditions to make sure it stays strong.
Repeat continuity checks after bundling and routing.
Inspect all labels and tags for clarity and durability.
Careful quality control ensures your custom wiring harnesses for cars will perform safely and reliably for years to come.
Tips & Mistakes
Pro Finish
You want your custom wiring harness to look and perform like a professional job. Follow these steps for the best results:
Avoid electrical tape for finishing. It peels off, leaves sticky residue, and looks messy.
Use mil-spec heat shrink tubing. This tubing gives a seamless, flame-retardant finish that handles high temperatures.
Always use proper tools. Wire strippers, soldering irons, heat guns, and self-vulcanizing tape help you make strong, clean connections.
Document your wiring and routing with photos and labels before you take anything apart. This makes reassembly much easier.
Plan your wiring job carefully. Measure wire lengths and routing to prevent mistakes during installation.
Choose connectors based on both mechanical and electrical needs. Standard connectors make future repairs easier.
Use professional-grade materials like DEI Hi-Temp Shrink Tubes to protect wires from dirt, dust, and solvents.
Dica: Label every wire and connection clearly. This step saves time during troubleshooting and future upgrades.
Troubleshooting
If your harness does not work as expected, use these steps to find and fix problems:
Start with a visual inspection. Look for frayed wires, exposed conductors, or loose connectors.
Use an OBD-II scanner to check for warning lights that point to wiring faults.
Test each wire with a multimeter for continuity. This helps you find broken or disconnected wires.
Inspect for fluid leaks near the harness. Moisture can cause corrosion or shorts.
Perform a wiggle test. Gently move wires and connectors to spot intermittent faults.
Check for knots or tension in the harness. Remove any stress to prevent future failures.
Observação: Clean contacts and make sure all connectors are seated properly to avoid hidden faults.
Common Errors
Many people make the same mistakes when building custom wiring harnesses. Watch out for these issues:
Using the wrong wire size or type for the job.
Damaging wires during stripping or assembly.
Choosing connectors that do not fit or match.
Making poor crimps or solder joints.
Forgetting to label wires, which causes confusion later.
Over-tightening or leaving wire ties too loose.
Skipping the layout plan, leading to misplaced or missing wires.
Avoid these errors to keep your harness safe, confiável, and easy to maintain.
You can build safe and reliable custom wiring harnesses for cars by following each step with care. Careful planning and attention to detail help you avoid short circuits, choose the right connectors, and protect your wires from damage.
Color coding and grouping wires make installation and repairs easier.
Labeling wires helps you find problems quickly and keeps your work organized.
Store cables safely and keep connectors clean.
Start your project with confidence. This guide gives you the knowledge to create a harness that lasts.
Perguntas frequentes
How do you choose the right wire gauge for your harness?
You should match the wire gauge to the current load. Use thicker wires for high-power circuits. Check your car’s manual or use an online calculator. Always pick a wire that handles more current than needed for safety.
Can you reuse old connectors and wires?
You should avoid reusing old connectors and wires. Old parts may have hidden damage or corrosion. New connectors and wires give you better reliability and safety. Always inspect parts if you must reuse them.
What is the best way to label wires?
Use heat shrink labels or wrap-around tags. Write clear names or codes for each wire. Place labels near connectors. This helps you find and fix problems quickly.
Dica: Waterproof labels last longer in hot or wet areas.
Do you need special tools to build a harness?
You need basic tools like wire strippers, crimpers, and a multimeter. For a pro finish, use a heat gun and quality crimping tools. These tools help you make strong, safe connections.
How do you test your custom wiring harness?
Test each wire with a multimeter for continuity. Check all connections before installing the harness. Power up the system and watch for warning lights or errors. Fix any problems before final installation.